In our calligraphy unit, we learned "beautiful writing". We worked in our altered books and practiced on pieces of paper. Personally, I loved learning calligraphy. Using the pen was hard at first, but eventually forming the letters became easier and easier. It will definitely be useful in the future.
Tuesday, January 15, 2013
Altered Book
Cover |
Front end page |
Back end page |
Collage |
Pictured scratched from oil pastel |
Figure drawing of one of my relatives |
Rose painted with ink |
Face made with white out and blown black ink |
Scratch board warm up and contour line drawing of a bow |
Figure drawing on painted watercolor surface |
Calligraphy techniques on a illustration |
Figure drawings on pages painted with watercolor |
Idea for a watercolor painting |
Scanography project and figure drawing on a painted watercolor surface |
Watercolor warmups |
Skeleton drawing |
Ear and lip studies |
Eye and nose studies |
Acrylic painting homework assignment |
Marker drawing blended with water |
Scratch board drawing. The right side is colored with markers. |
Our altered books were a great experience. We were able to do homework assignments, free drawing, and write down ideas in them. In the next few months, I hope I can turn it into a personal art journal. One of the highlights is the cover. I painted it with white then carved it out into a vine pattern. I then went over it with watercolor. On the inside, I used ink and pages of classic books to create the end pages.
Printing Project
Ink
I started out with a plan. My print had to include at least three colors, so I decided on brown, green, and red/ yellow. After I created my image of a flying bird among branches and leaves, I traced it onto my block and cut out the image. After each color, I cut away the part that I wanted to stay that color. In order to complete the assignment I had to complete several prints: 6 identical prints, 1 print on a found material, 1 print on a created material, and 1 multiple print. I started with the 6 identical prints. I soon discovered that I had to do more prints than those assigned in order to make enough acceptable prints. Two of my found materials turned out well, so I have included both instead of just one. I decided to make my found material by painting a piece of paper with watered- down acrylic. The multiple print was hard because it used a different technique. I had to figure out how to line up the block with the transparent paper. During the process, some unwanted ink got on the paper and smudged. I fixed this by painting the paper with watercolor.
Figure Drawing
Markers, Ink, and Watercolor
I learned so much about how to draw human figures in this project. After I had enough figures, I painted then with watercolor. I decided that I should use the ink to unify the piece by painting the background and touching up parts of the figures, such as the hair. I then used a sponge to scratch away some of the ink. My art teacher then suggested that I incorporate the techniques that I learned while doing my scratchboard into the piece. On the sides and in the spaces in between the figures, I scratched various faces. Overall, this project was definitely a great experience with working with live models and using a variety of mediums.
Bust
Acrylic, Clay, Newspaper, Elmer's Glue
Self Portrait
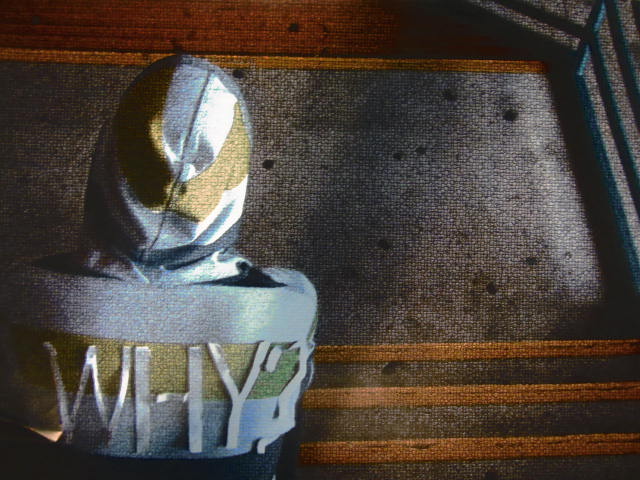
Medium, Acrylic, Latex Paint
I started this project with an image in my mind of blowing hair. I then incorporated this image into my original photograph. Before I started, I painted the entire paper with Latex paint and used various instruments to create texture. The size of the photograph was proportionate to the size of the paper, so it was relatively easy to create a grid. After I made the grid on the textured paper, I made an outline of the main features. I decided that a combination of various shades of purple, orange, and pink colors would look good on this piece. One of the challenges that I faced was trying to lighten up the image after making it too dark. Although it is still dark, I think it looks much better. I used several layers of medium to bring the piece together. The entire painting was done with my fingers. I never imagined that a finger painting could look so good. After I was done, I never wanted to go back to brushes again. This project was inspired by Chuck Close.
Filtered Photograph Project
In this project, we took one of the photographs from the Resolutions Project and used Photoshop to apply a filter. Out of all to the options, I found that the mosaic tile filter worked the best.
Resolution Social Issue Photography Project
Words are included in each of my photographs to highlight the
unspoken thoughts and feelings of teenagers across the country. In a world
filled with controversy, many teenagers have trouble finding their own voice.
They face social pressure to conform to the views of their peers, while
secretly holding their own opinion. One may choose to never share their own
belief. Instead, the individual may decide to keep perhaps groundbreaking
thoughts and feelings locked within their own mind. The question is “Why”? Why do teenagers feel the need to conform?
The answer is fear. Each teenager has a voice. They simply need to have the
courage to vocalize it.
I enhanced each of the photographs with Photoshop. In this project, I was able to not only communicate a message, but also gather experience with working with models. The boy in the first picture is actually my childhood friend who I hadn't seen in six years until this project. I cut out the letters and then taped them to his shirt. I have to give a special thanks to Jessica for allowing me to paint on her face with Tempra. The third picture is my sister, who was graciously laid on the driveway that I had written on with black pastel.
Scratch Board and Digital Painting
Scratchboard, Photoshop
I really like how this project turned out, especially the eye in both images. Varsha volunteered to be my model, and I photographed her outside as she peeked out of some branches near the trailers. Using the photograph, I first scratched the image on the scratchboard. I had to add the leaf on the left side and increase the visibility of the leaf below the other one on the right side in order to improve the composition. For the second time, we used Photoshop to enhance the images. It was much easier this time. One of things that I used to make the image more interesting was adding more colors, such as blues and purples to the greens. I used a lot of digital blending tools on the face especially. Both the scratchboard and the digital painting represent the moment of sudden surprise that comes from happening upon something unexpected.
Subscribe to:
Posts (Atom)